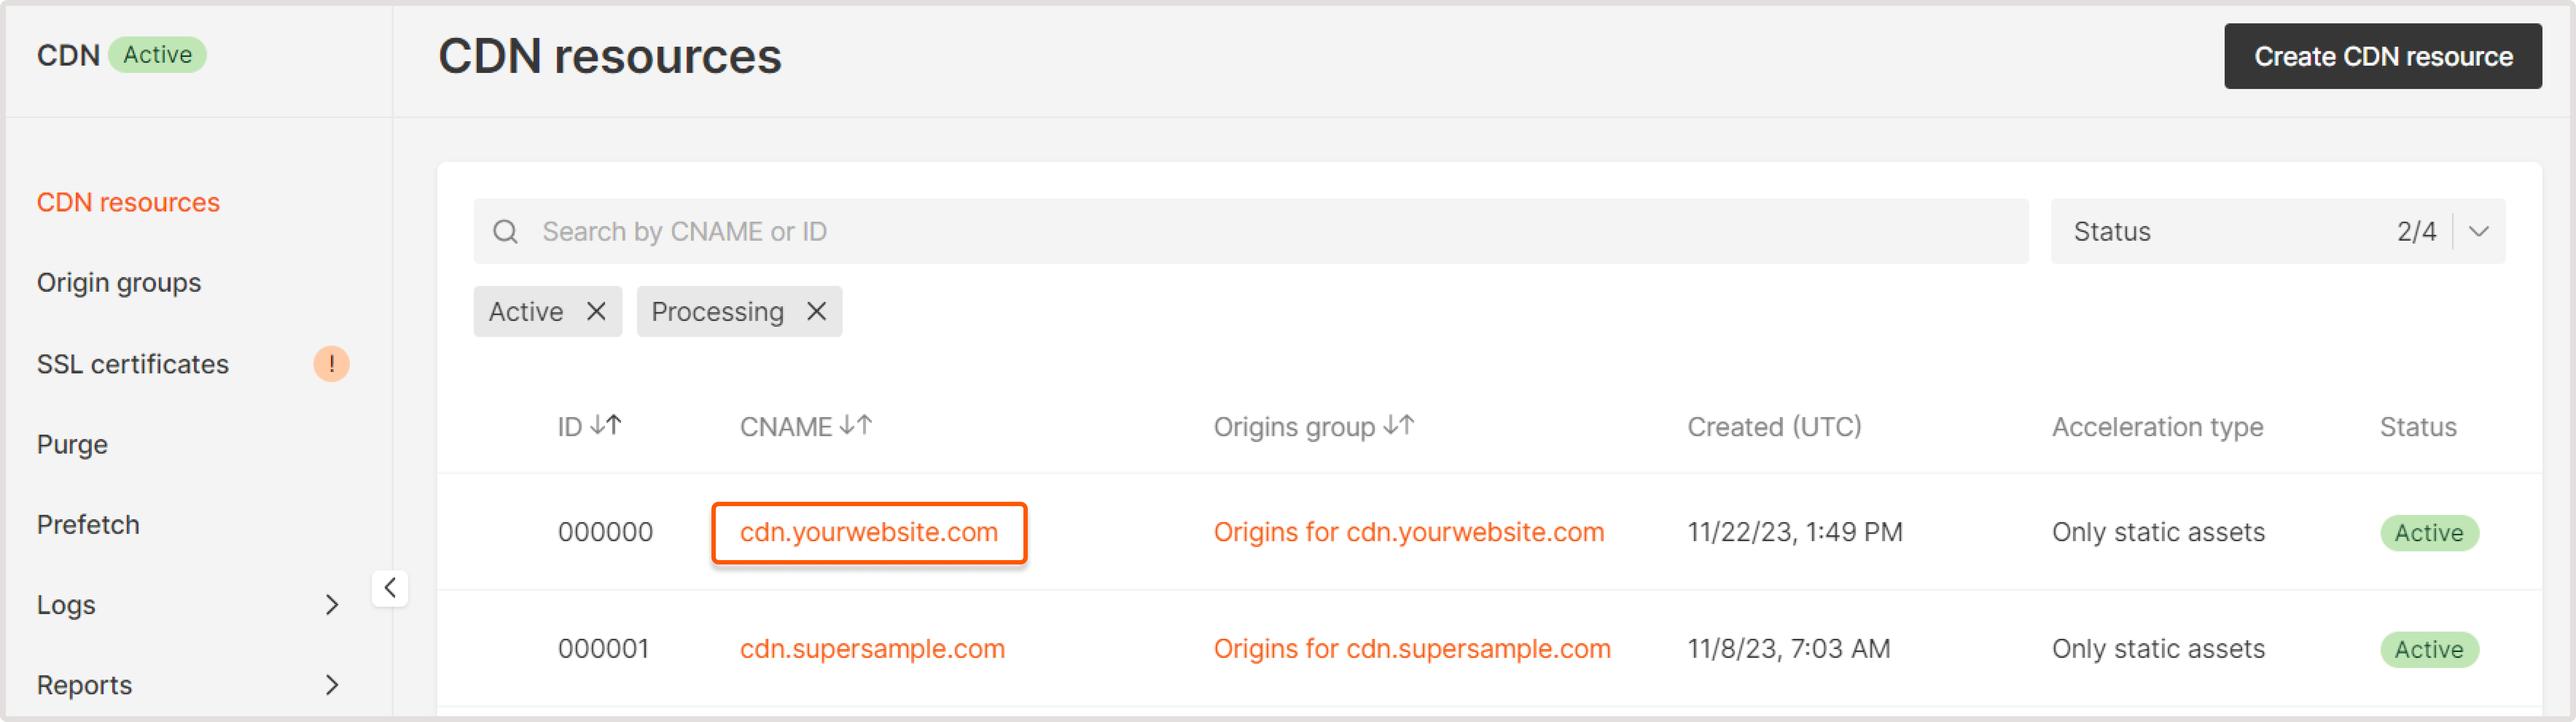
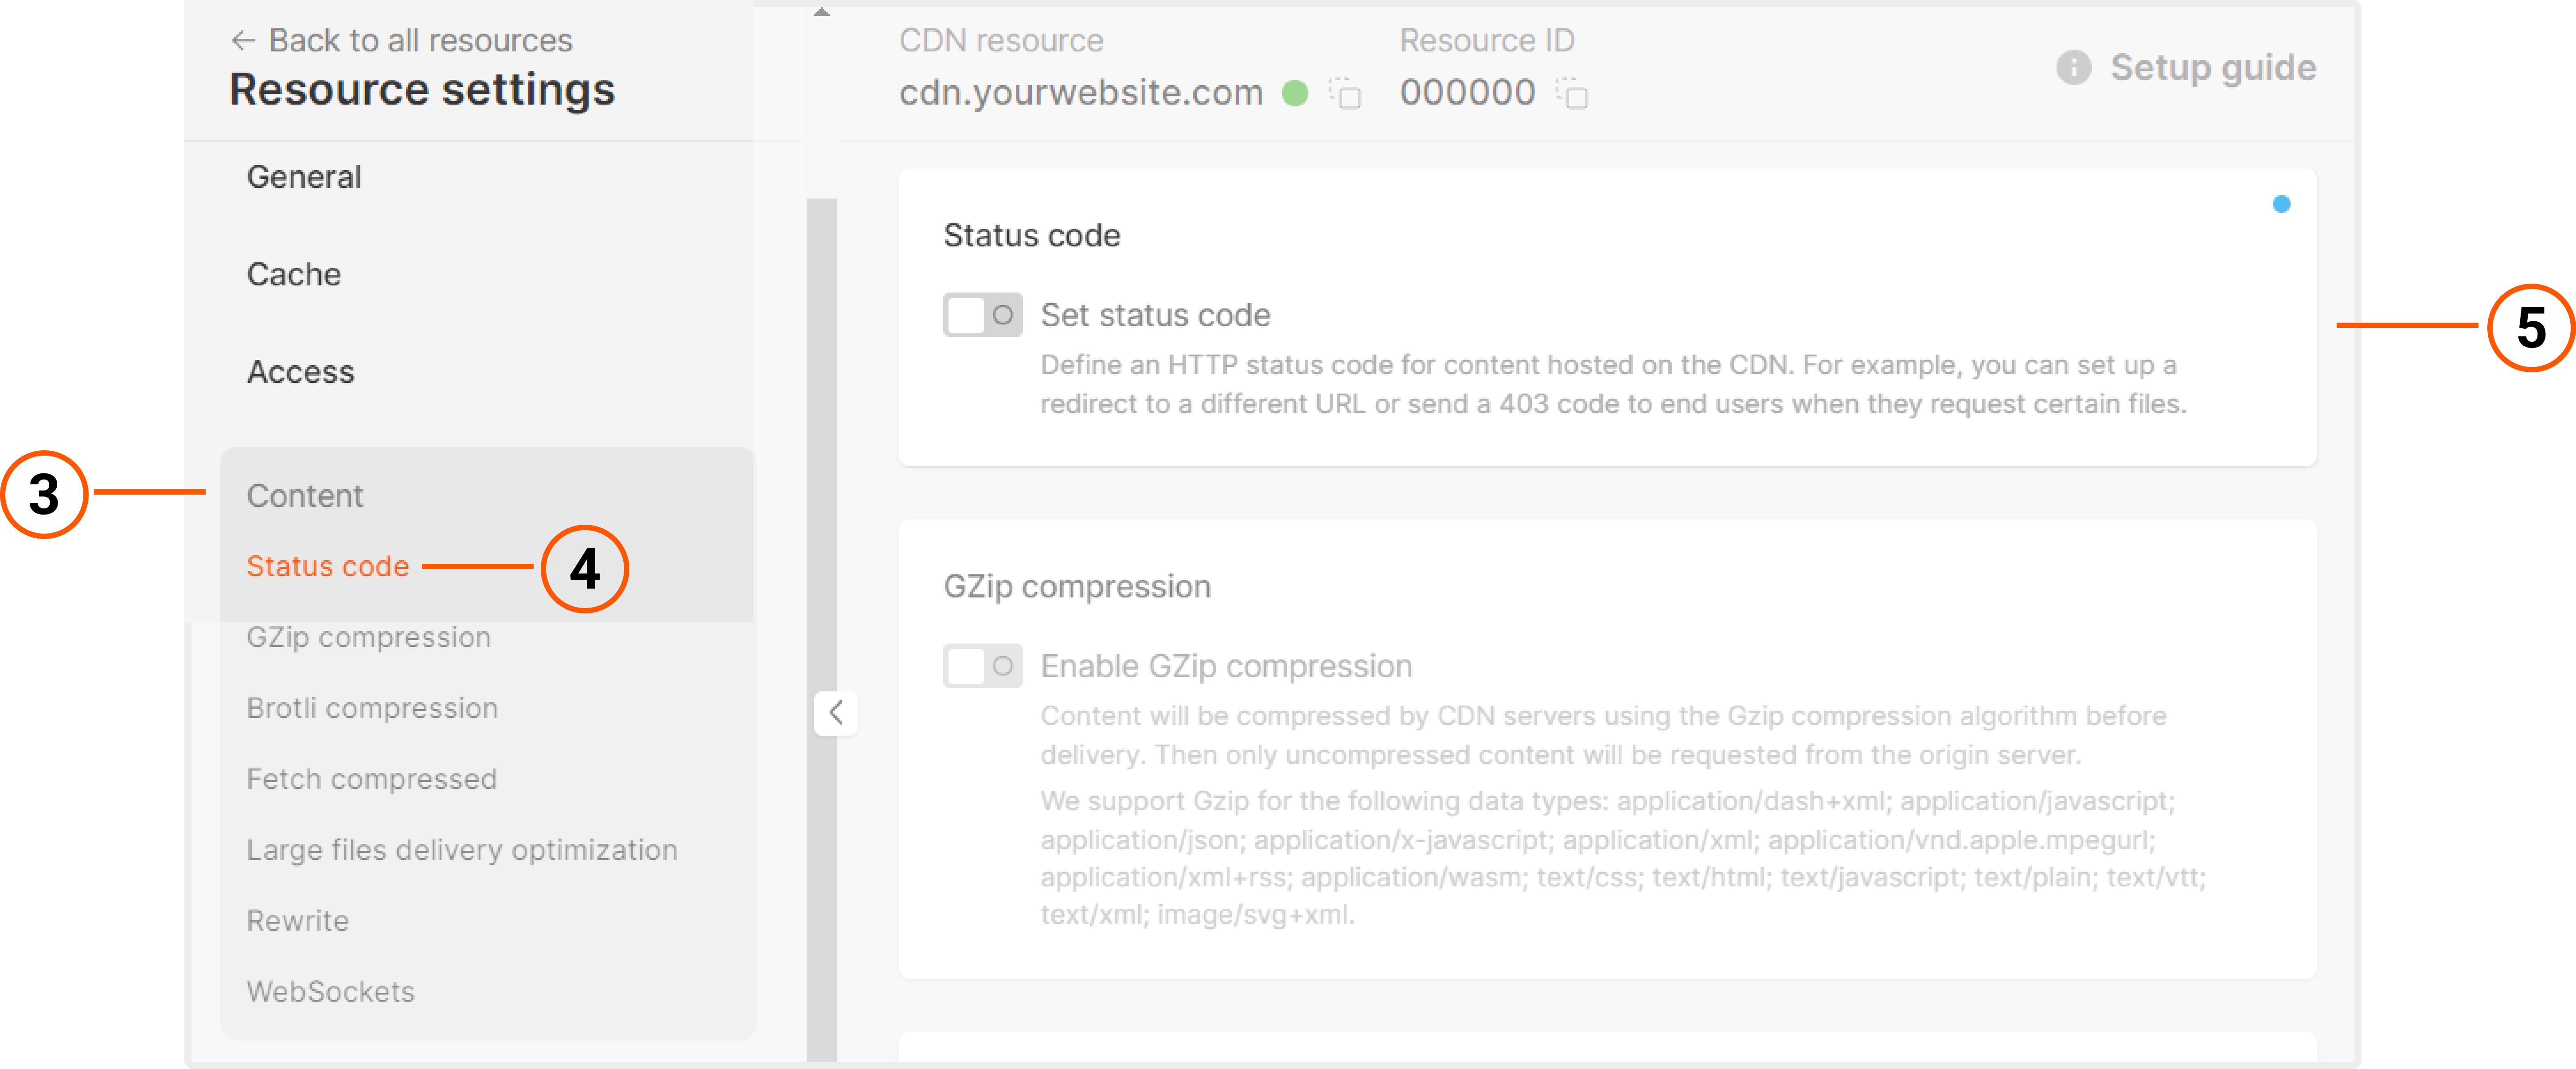
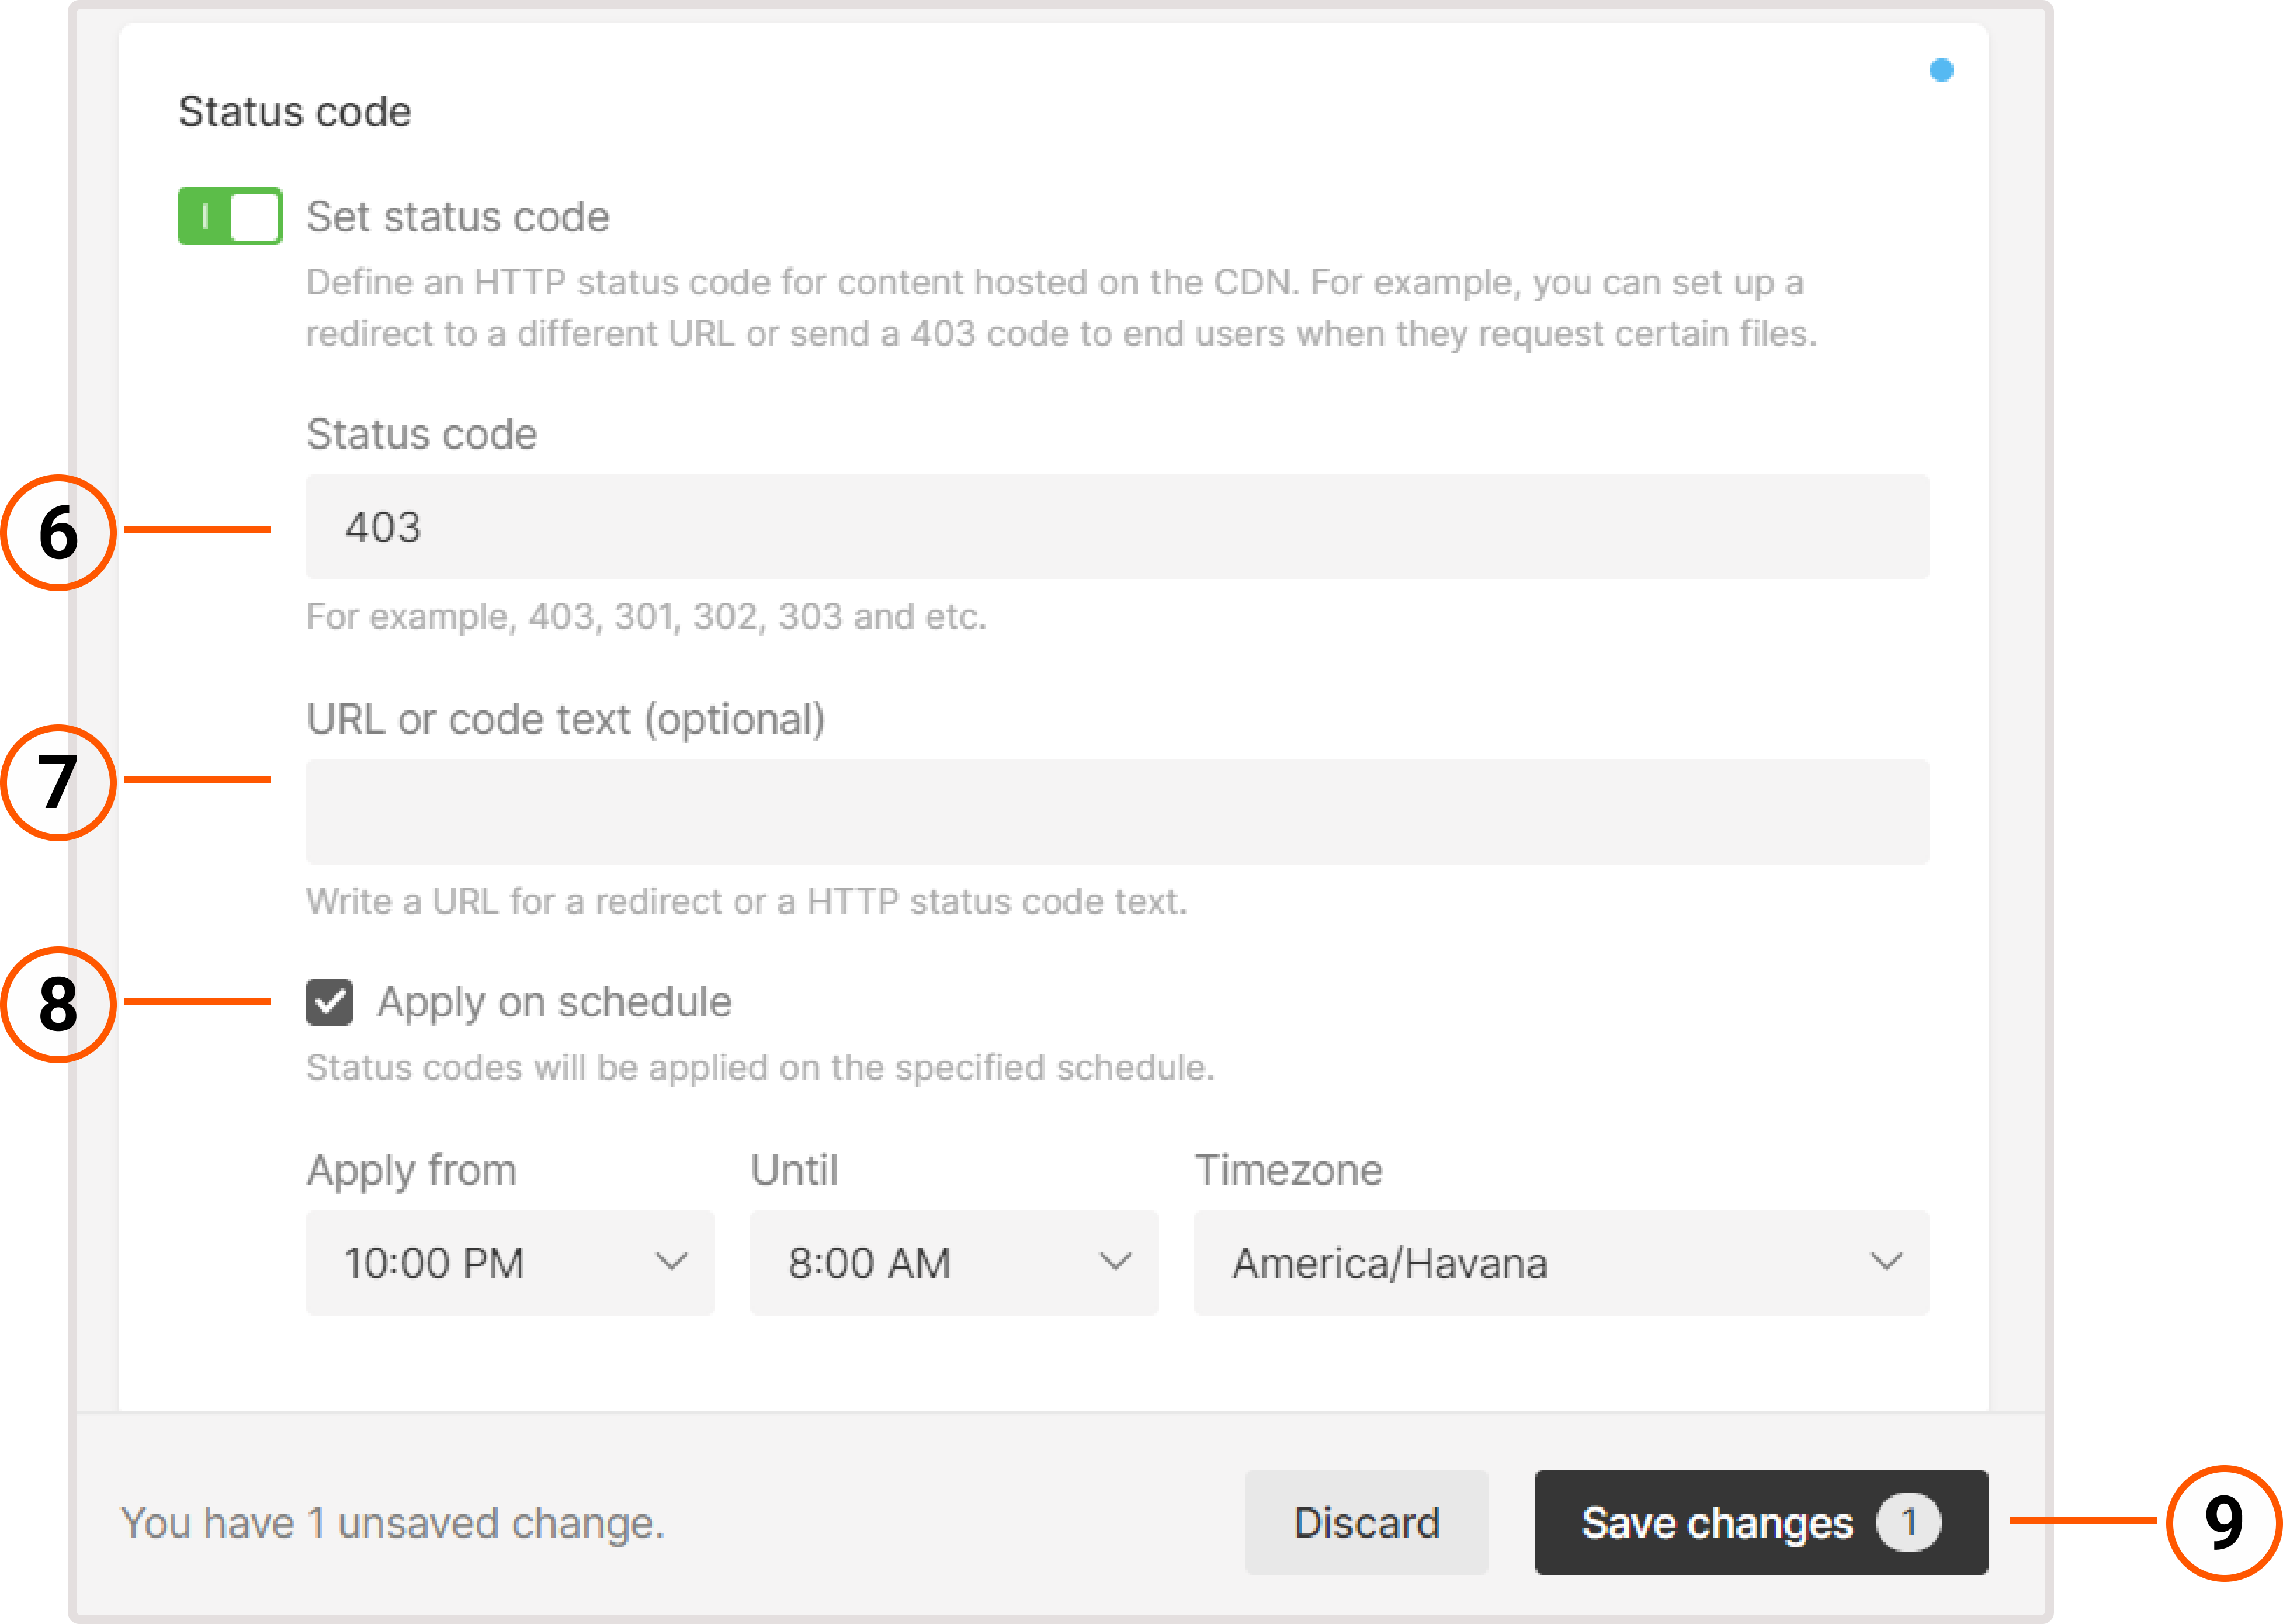
1. In the Gcore Customer Portal, navigate to CDN.2. Click the CNAME of the required CDN resource to open Resource settings.3. Click the Content section to open nested options.4. Click Status code.5. Enable the Set status code toggle.6. Specify the desired HTTP status code in the field.CautionYou can’t specify 408, 444, 494, 495, 496, 497, or 499 codes.
1. In the Gcore Customer Portal, navigate to CDN.2. Click the CNAME of the needed CDN resource to open Resource settings.3. Go to the Rules tab.4. Click Create rule.5. In the menu that opens, click Create blank rule.On the page that opens, specify to which files the rule for custom code will be applied. Configure the other settings on the page. Our guide on creating a rule manually explains the configuration options in depth.6. At the end of the page, click Add option.7. Click Status code in the list to add the option to the rule.8. Click Close.9. Enable the Set status code toggle.10. Specify the desired HTTP status code in the field.CautionYou can’t specify 408, 444, 494, 495, 496, 497, or 499 codes.